Pages

Thursday, December 27, 2012

After Christmas Sale

Hope everyone enjoyed their holiday.  I spent the majority of it, home sick in bed.  I'm slowly getting back to normal.

Every year I say I'm going to shop the after Christmas sale and I never end up doing so.  This year, since I was home sick, I decided to take advantage of the voluminous emails I was receiving and check out the sales. 

Of course, most of the sale items I wanted in clothing were either out of stock or no longer in my size.  The only clothing item I managed to get on sale was from one of my favorite stores, Zara.  It was the CAMOUFLAGE TROUSERS WITH ZIPS (originally $59.90 and on sale for $49.99)  http://www.zara.com/webapp/wcs/stores/servlet/product/us/en/zara-us-W2012-s/317508/917019/CAMOUFLAGE%2BTROUSERS%2BWITH%2BZIPS

I also purchased a few items on sale for the home.

First item was a tablecloth I was eyeing on Wisteria Woodblock print tablecloth.  It was originally $89 (I believe) and I got it on sale for $22.25!  I think I will use this for Easter or maybe next Christmas. 

 
The next item I purchased was from Kohls.  It was the Croft and Barrow Madeline napkin Croft and Barrow Madeline napkin.  These were originally $5.99 each and I got them for $2.99 plus a coupon code for 15% off (promo code CHEERS).  I liked these napkins because I thought they complimented my china I got five years ago from Crate and Barrel (no longer available). 


What, if any, did you guys get on sale?

Sunday, December 16, 2012

Candy Sleigh Project

I saw the candy sleigh idea on Pinterest and decided I would try and create some.  Can I tell you how addicting these sleighs are! Once I got the rhythm, I was on a roll.  I made 25!

I purchased candy canes (different brands and flavors); the mixed bag of Hershey's mini bars and also purchased the holiday Hershey Nuggets (almond and plain); kit kats; ribbon and mini bows.

These were fairly easy to make.  The only tools you need are scissors and a hot glue gun.  You just need a few drops of glue to secure the candy canes and bars into place. 

Once the candy canes are glued to the kit kats (by the way, I decided to wrap my kit kats in nice holiday wrapping paper); you can then start gluing and stacking your bars (4 bars, 3 bars, two and then one).  Tie the ribbon in two sections and finish off with a bow.  Check it out!


Monday, December 10, 2012

Christmas Tablescape for 2012

I love the holidays.  Besides the hustle and bustle of everyone trying to get their shopping done, dealing with traffic and annoying lines, it's a time for family and friends to be together.  I also love to decorate!  My inspiration comes from looking at other people's blogs, magazines, stores, etc. . . . it gets my creative juices flowing.  Which brings me to my dining room tablescape.

I purchased a few new items this season and kinda knew which direction I was going to go into when decorating the table.  We recently updated our dining room (adding crown molding, chair rail, frames and a new paint color).  So for me, this was a brand new room. 

Some prints we have in our dining room was my jumping off point on what the color scheme would be.  While I love silver, I've been seeing a lot of gold and brass this season.  And, mercury glass is everywhere in the stores.  I wanted to see if I can mix the two.  Once I started laying everything out, ideas started to come to mind.  So, here is the finished product!

Note:  I purchased the glass candle holders from Pottery Barn a couple of years ago and they are still in stores.  The candles are also from Pottery Barn (on sale too).  The tapered candles are from Crate and Barrel, as well as the plates. The acorn glass ornaments are from West Elm, as well as the birds.  The silver reindeer is from ZGallerie.  The gold tags are from The Container Store.  And, the runner is from Michael's Craft Store.  The black tablecloth is from Bed, Bath and Beyond.  The lights are from IKEA and the garland is from Home Depot (real).


Tuesday, December 4, 2012

Family Room (Start to Finish)


I have so many pictures of our demoliation and construction phase of the house.  I said my project is to create a book of all my before and after pictures of the house project.

I wanted to share our family room now that it's completed.


New Beginnings


So, I sound like a broken record . . . it's been a while.  Okay, a LONG while.  These past couple of years have been a rollcoaster of ups and downs in my life. 

Dealing with my sister's ovarian cancer and my own cancer shortly thereafter, I'm happy to report we are doing well and thankful for making it through.  I look back and can't believe I have been through A LOT healthwise but look forward to positive things ahead.

My husband, family and friends have been my support team.  I'm truly thankful to have them in my life. 

On that note, let's get back to my blog.  I've have so many updates and will try and post recent projects around the house.

I'll start with our latest project, the dining room.

We moved into our home four years ago and everything is new!  With the exception of the basement, my husband (the Engineer) designed the new house; had the old house torn down.

Decorating a home from scratch is exciting but challenging.  I wanted to get the main rooms done right away.  It's true what they say (whoever "they" are).  You really get a feel for a house or room when you've lived in it for a while.  And, my taste changes every couple of years.

I knew I wanted crown molding in the dining room so that was a project we had on our to do list.  Or, like my husband says, the "honey do list".  The dining room project grew longer when I added a new paint job, chair rail and frames (like wainscoting).  We didn't do the traditional wainscoting because that would mean ripping up the base molding (which is new). 

My inspiration for this project was from Censational Girl blog, where she added wainscoting to her living room.  It really added character to the room.  So, the project began.  Taking everything out of the room and emptying the china cabinets was a good time to see how much I've collected in four years! 

We picked up samples of trim for the moldings and chair rails and frames.  I also picked up samples of paint.  I knew I wanted a lighter color, compared to the darker color I started with.  I ended up getting a custom color (thanks to the guys at the Paint and Paper store in Jersey).  We played around with colors because I could not find the right color out of the hundreds and hundreds of paint colors on Benjamin Moore's fan decks. 

Now the real challenge was to see if I can get this room done by Thanksgiving.  We have been hosting Thanksgiving since we moved into our home.  We cut it close!  Delays occurred, of course but we completed it a couple of days before Thanksgiving. Whew!

Here is a before and after picture.


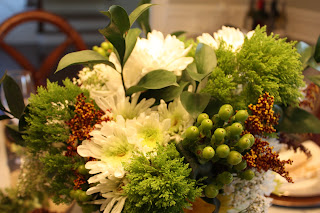
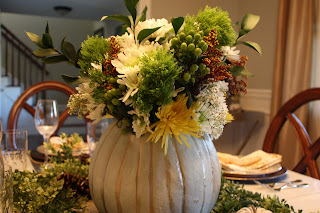
I have a mirror for the new space I want to add between the china cabinets and eventually will add a rug.  Here are some other pictures from my Thanksgiving tablescape.